How To Set Up Your Beaglebone Black As A Desktop Computer
Di: Everly
Eject the microSD card from your computer, insert it into the powered-off BeagleBone Black, and apply power to your board. You’ll notice USER0 (the LED closest to the S1 button in the corner) will (after about 20 seconds) begin to
Robot Control Library: Networking WiFi
In this lesson we show you how to boot up your Beaglebone Black, and how to connect via the Putty SSH terminal client, and how to remotely run the graphical desktop on
Beagles are tiny computers ideal for learning and prototyping with electronics. Read the step-by-step getting started tutorial below to begin developing with your Beagle in
There are several USB ports on the BBB. The one you need for initial setup, is the USB client connector and it is on on the same side as the DC barrel jack socket. So, check to
- Setting up Beaglebone Black with Debian and SSH with Windows
- Beaglebone Black Tutorial
- Basics — BeagleBoard Documentation
Using Win32DiskImager, write the image to the uMMC card (make sure you don’t write it to your computer’s hard disk!) Plug the other end of the Ethernet cable into your router
3.0 Connecting Up Your BeagleBone Green This section provides instructions on how to hook up your board. Two scenarios will be discussed: 1) Tethered to a PC and 2) As a standalone
You should see an output on the screen, which is a response from your computer to say everything is ok. Now that everything is setup ok, you now need to tell the BeagleBone
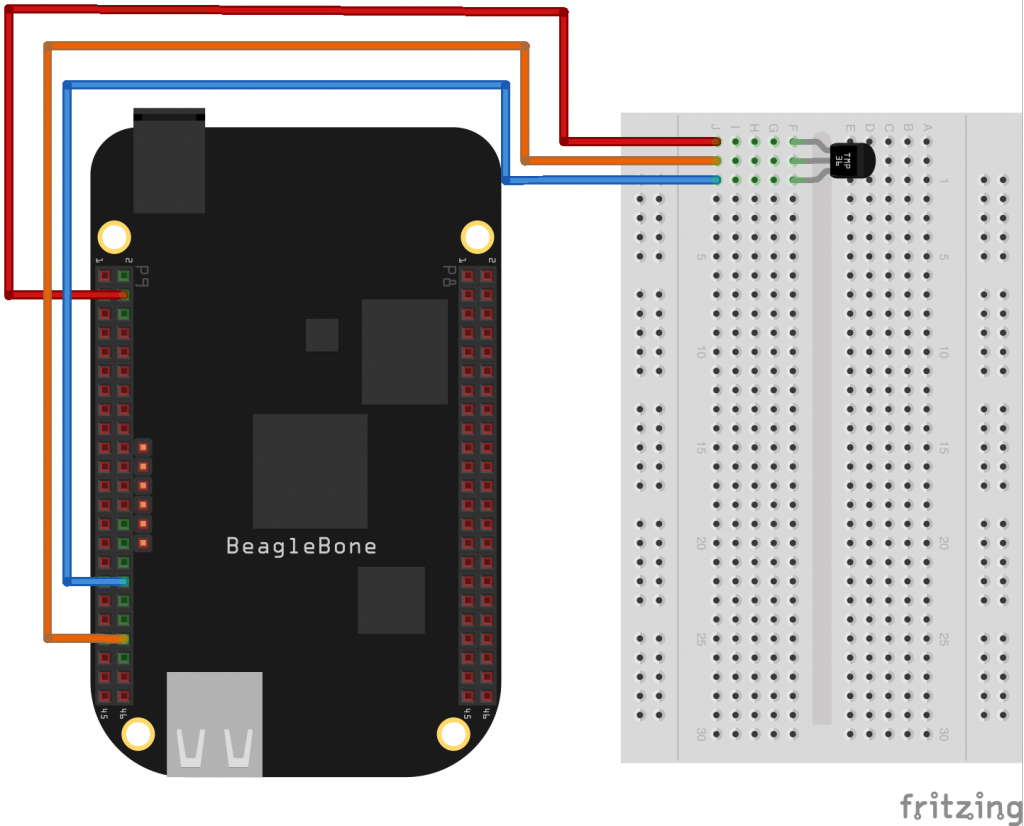
You will need to set up your BeagleBone Black and sensor hardware, your CloudPlugs account and your BeagleBone Black software so you can monitor published data from the CloudPlugs IoT web desktop. Hardware.
Step 8: After booting both the EVM and the BeagleBone Black, the EVM splash screen should show up. Log into the BeagleBone Black by launching PuTTY on the computer
For an up-to-date list of confirmed working accessories please go to `BeagleBone_Black_Accessories `_ Connecting Up the Board —– 1. Connect the big end of
By default, no password is set. Your terminal window should look like this: When you connect your computer to your BeagleBone for the very first time, you’re prompted by a
and after 1 minute, the BeagleBone appeared as an external drive on my computer. Just like it’s written in the instructions. With the BeagleBone Black getting started is
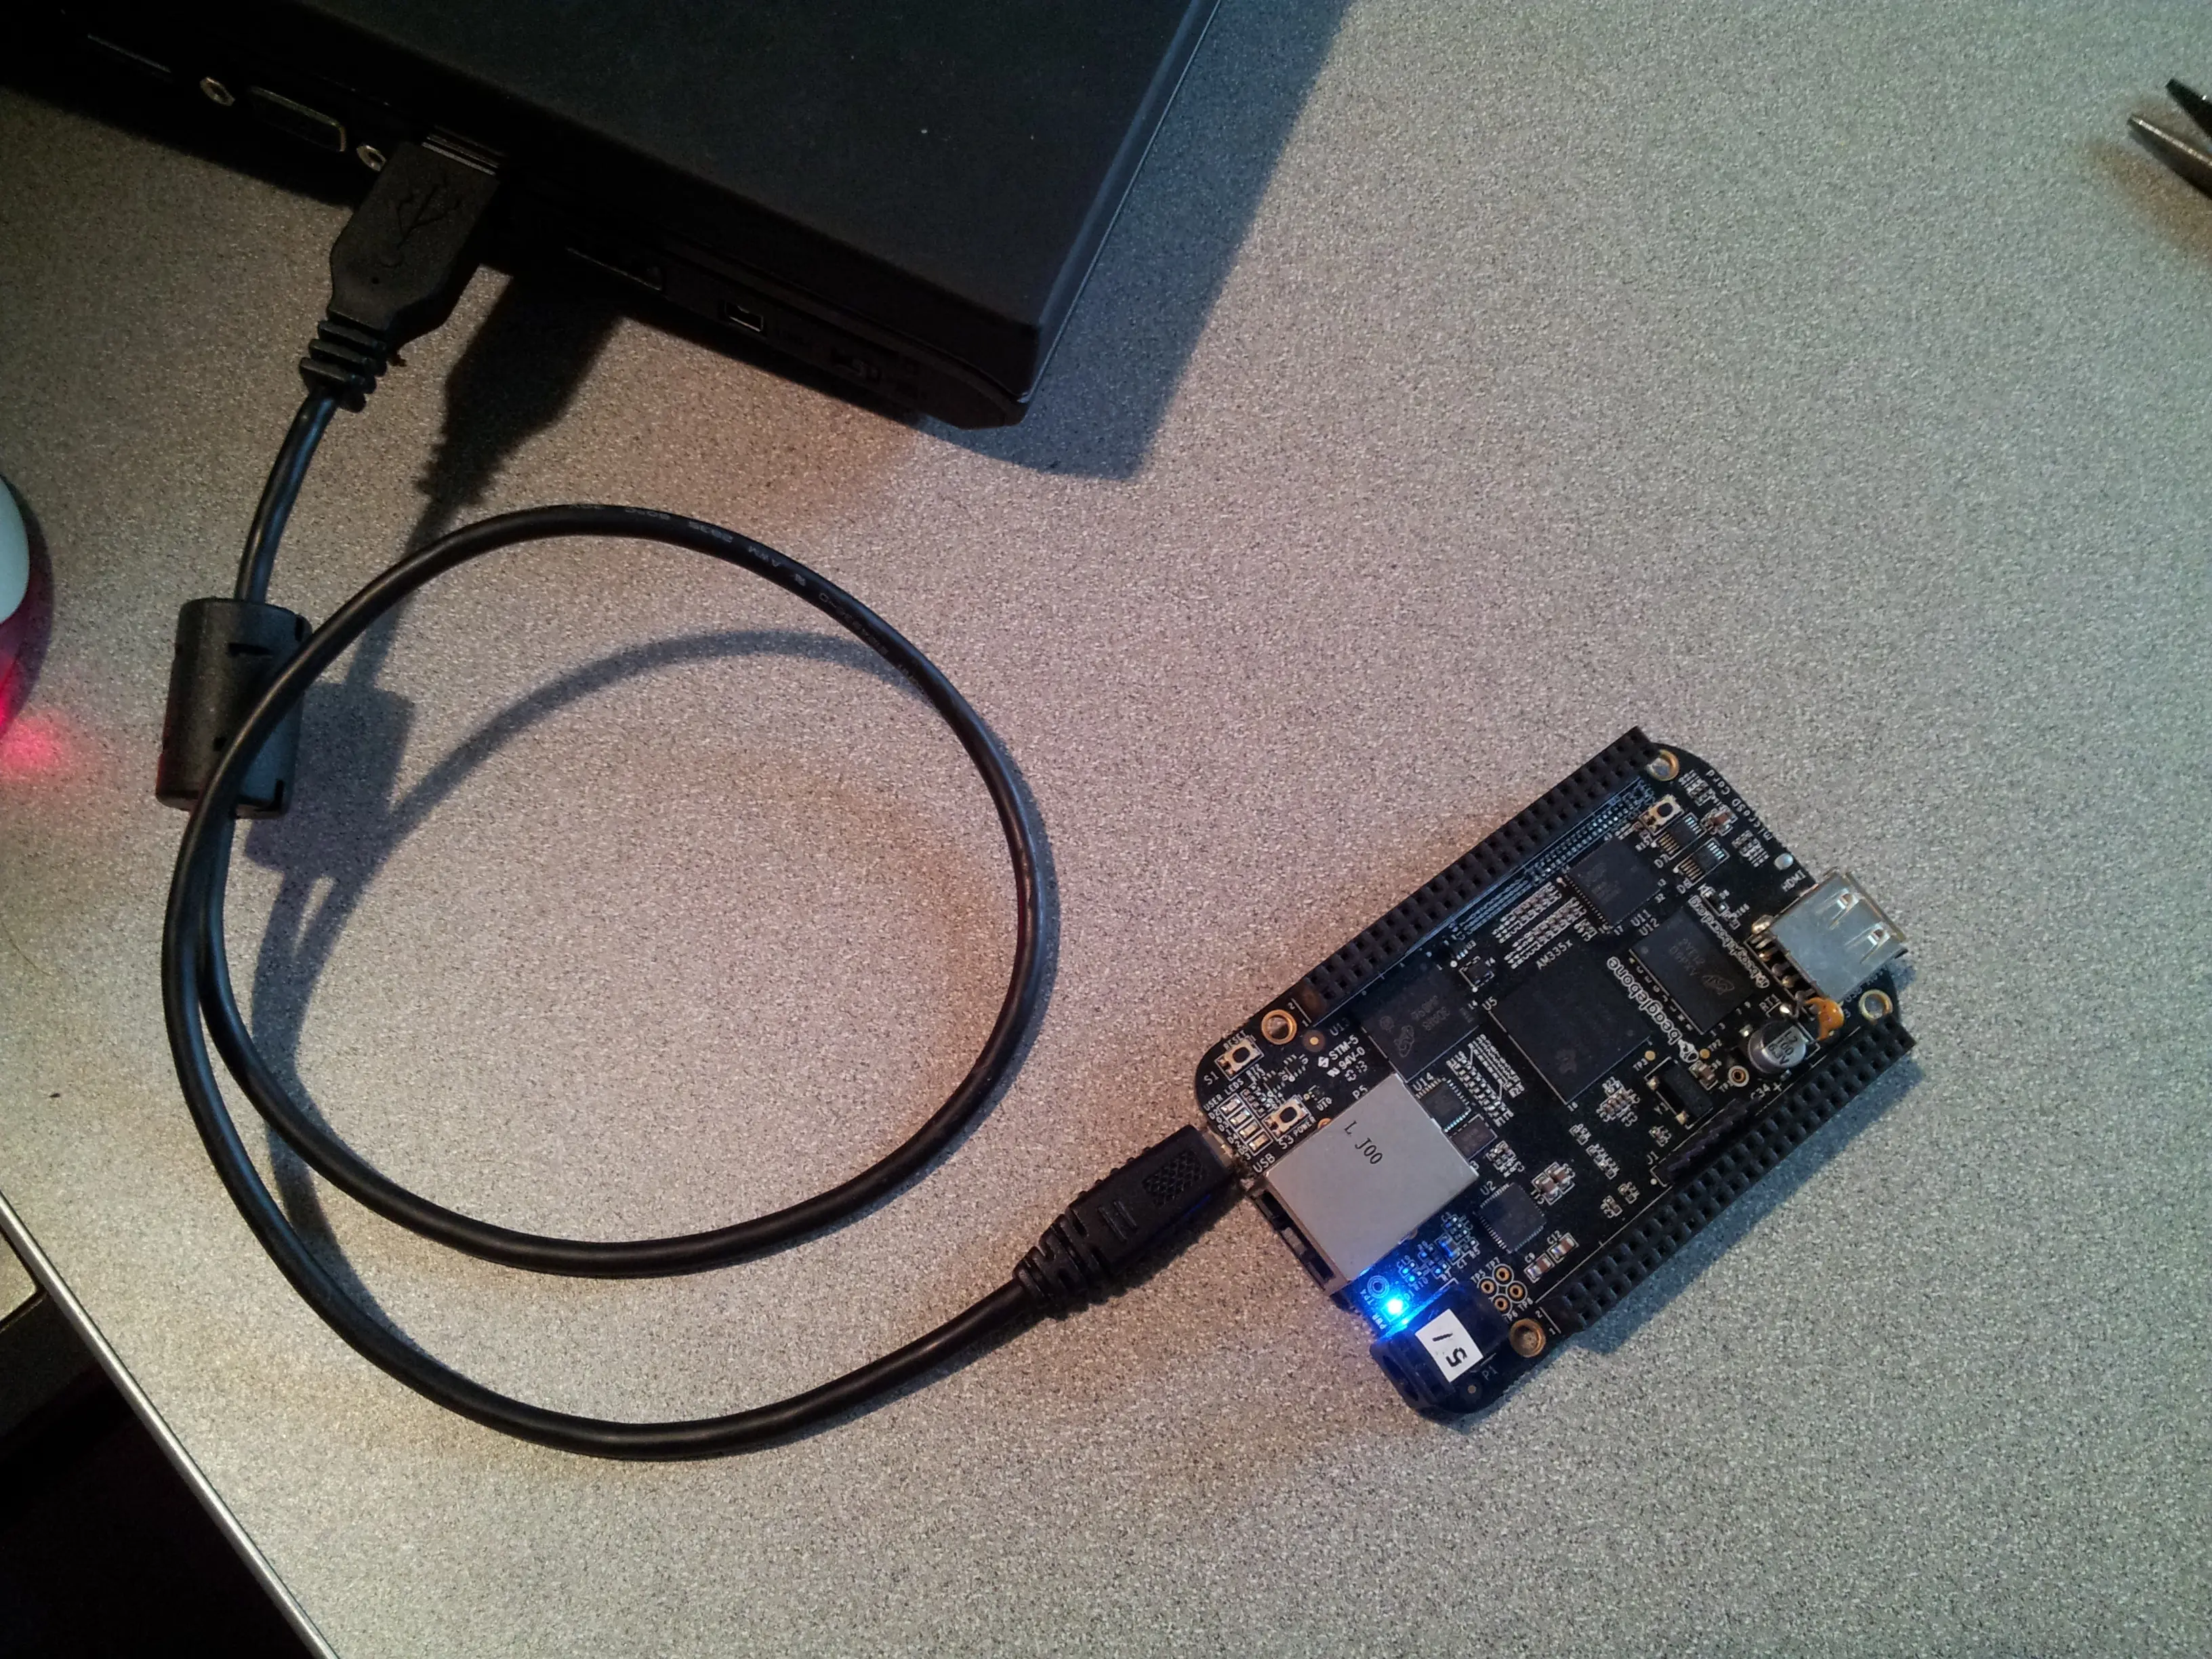
Connect the USB cable’s large connector to the USB port on your laptop or computer. The board will turn on, and as can be seen in the figure below, the power LED will
If you are going through these lessons with us, you can pick up your Beaglebone HERE. Beaglebone Black LESSON 1: Understanding the Pinout on the Beaglebone. Beaglebone
You are ready to build your first example. This application deploys a LabVIEW VI to your BeagleBone Black that blinks an LED on and off at a fixed rate. Find an Example. Connect
You own a Beaglebone Black but don’t have the budget to get a display, keyboard, mouse or you don’t want to populate your one and only USB port on the black with this
This chapter explains how you can connect a few peripherals to your BeagleBone Black and turn it into a desktop computer. It probably won’t be as fast as your computer, but it still can be quite
In part one of this series I introduced the BeagleBone Black, a low-cost embedded computer platform that supports Qt. In this second blog post, I’ll look at how to get
The file will be opened by your browser on the PC and you should get a display showing the Quick Start Guide. Your board is now operational! Follow the instructions on your
Test the Internet connection by using your Beaglebone Black connected USB keyboard/mouse and monitor to start up a shell prompt on the LXDE Window. Once you get
Beaglebone black ubuntu 18.04 image – (Image Source: Pixabay.com) How do I install Debian on a BeagleBone Black? Download one of the following images to use as your
The main purpose of this blog entry is for me to remember what I did to configure the BeagleBone-Black single board computer. A couple of years back (somewhere around
I was really intrigued by the BeagleBone Black’s (BBB) low cost, great performance, and IO all on the familiar Ubuntu OS. I am still quite new to the BeagleBone
We are going to be setting up our own single board, fanless computer using the beaglebone. We will setup a mini SD card so that we can boot Ubuntu onto the beaglebone, we will setup a a
Your Beagle should be running a DHCP server that will provide your computer with an IP address of either 192.168.7.1 or 192.168.6.1, depending on the type of USB network adapter supported by your computer’s operating
This section provides instructions on how to hook up your board. Two scenarios will be discussed: As a standalone development platform in a desktop PC configuration. In the box you will find
If you are a fan of single-board computers or are looking to delve into the world of embedded computing, then the BeagleBone Black is a fantastic option to consider. This compact yet
Introduction. This blog post describes how to get the BeagleBone Black (or variants, such as the PocketBeagle) connected up, and communicating! There are official
Setup your workstation’s ethernet IP address to be on the same network as your BeagleBone Black from the last section. For example, if you set your BeagleBone Black’s IP address to be:
Your Beagle should be running a DHCP server that will provide your computer with an IP address of either 192.168.7.1 or 192.168.6.1, depending on the type of USB network
Easy-to-follow plans show you how to wire up and program a Web-controlled roving robot and an e-mail notifier that lights an incandescent lamp. Set up the BeagleBone Black and explore its
- Gartenfiguren Und Steinfiguren Zur Gartendekoration
- Clint Eastwoods Dirty Harry-Franchise, Rangliste
- Uso Dello Strumento Portqryui Con Sql Server
- Freeslotter: Onlinedienste, Online-Chats
- Allroad Fahrrad – Allroad Bikes Test
- Gemeinschaftliche Pv-Anlage: Was Gilt Für Die Beschlussfassung
- Balkonsanierung – Balkonsanierung In Meiner Nähe
- Maggi Angebot Lidl | Maggi Fix Sonderangebot
- Merlot: Top-Weine Des Jahrgangs 2005 Aus Dem Gebiet Pomerol
- Elektronischer Schließzylinder Anleitung
- Ifsc Code For Deutsche Bank Pune, Pune, Maharashtra
- Alanya Pauschalreisen 2024 / 2025 Mit Flug, Hotel
- Frau Böhm Sagt Nein Dvd Jetzt Bei Weltbild.de Online Bestellen
- ≫Cómo Usar El Rotativo Luminoso En Un Tractor
- Arrecife Hafen Tipps – Arrecife Hafen Webcam